How to Create a Squarespace Burger Menu for Desktop with CSS
A Step by Step Guide: Are you looking to modernise the design of your Squarespace website with a simple and functional burger menu? Look no further! In this step-by-step guide, we'll teach you the steps you need to take to create a beautiful burger menu using custom CSS code, enhancing both the aesthetics and user experience of your site.
Go here to see the completed CSS code.
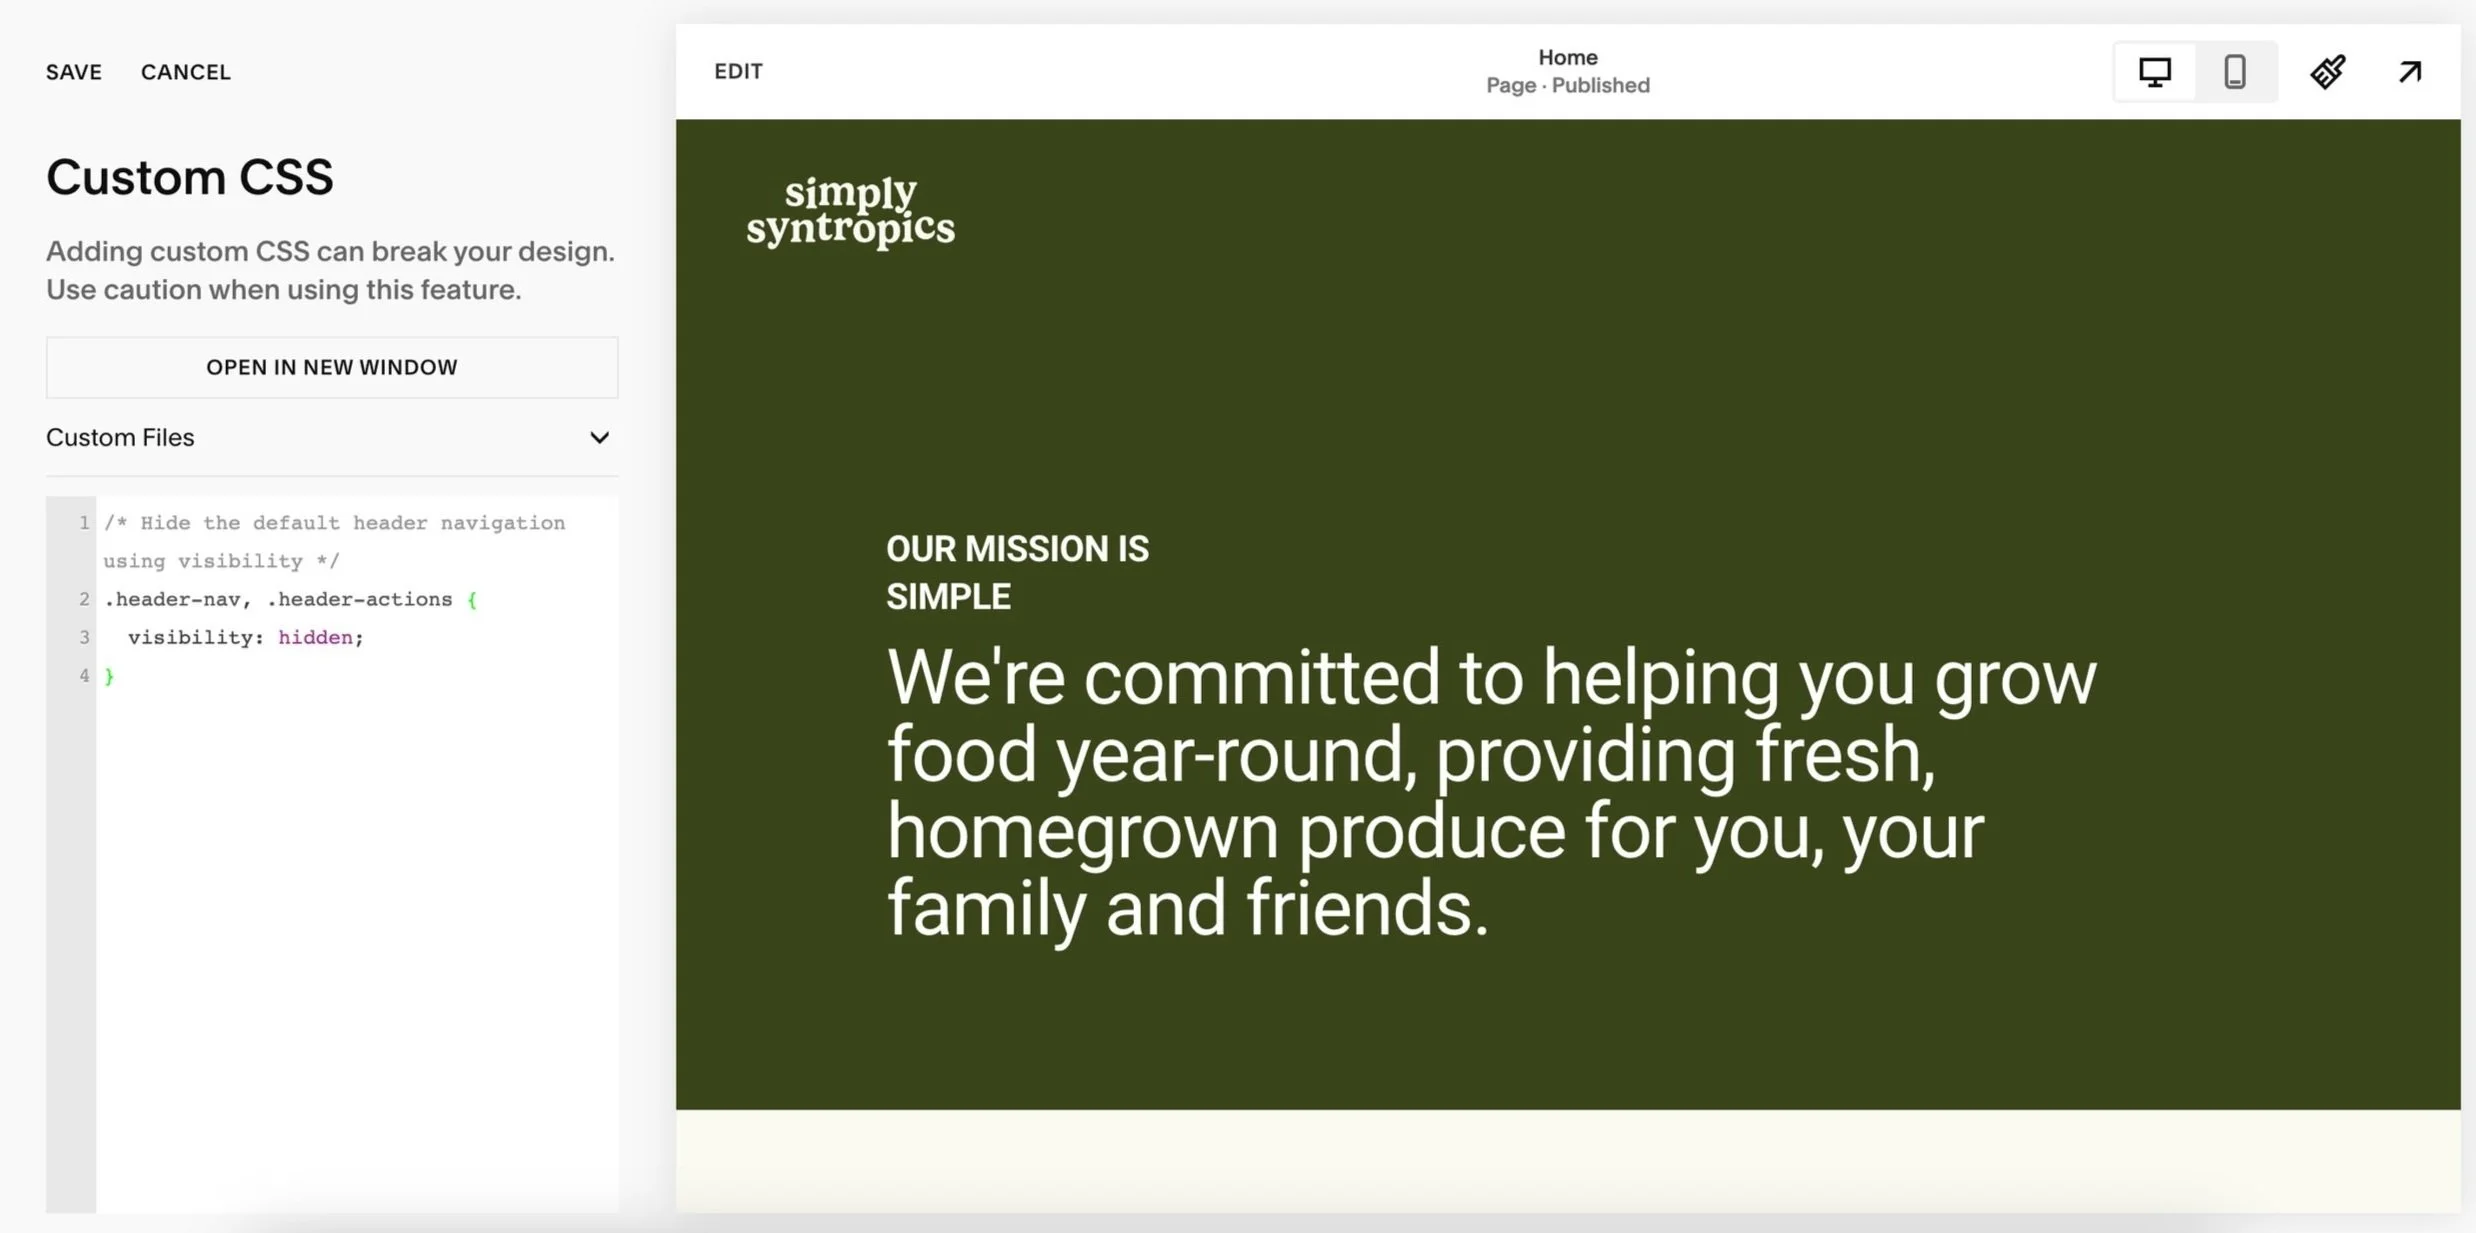
Step 1: Hiding Default Header Navigation
/* Hide the default header navigation using visibility */
.header-nav, .header-actions {
  visibility: hidden;
}
Explanation:
This code hides the default header navigation elements using the CSS property
visibility.The
.header-navand.header-actionsclasses are selected, which typically represent the navigation links and any additional actions in the header.
Hide the default header navigation
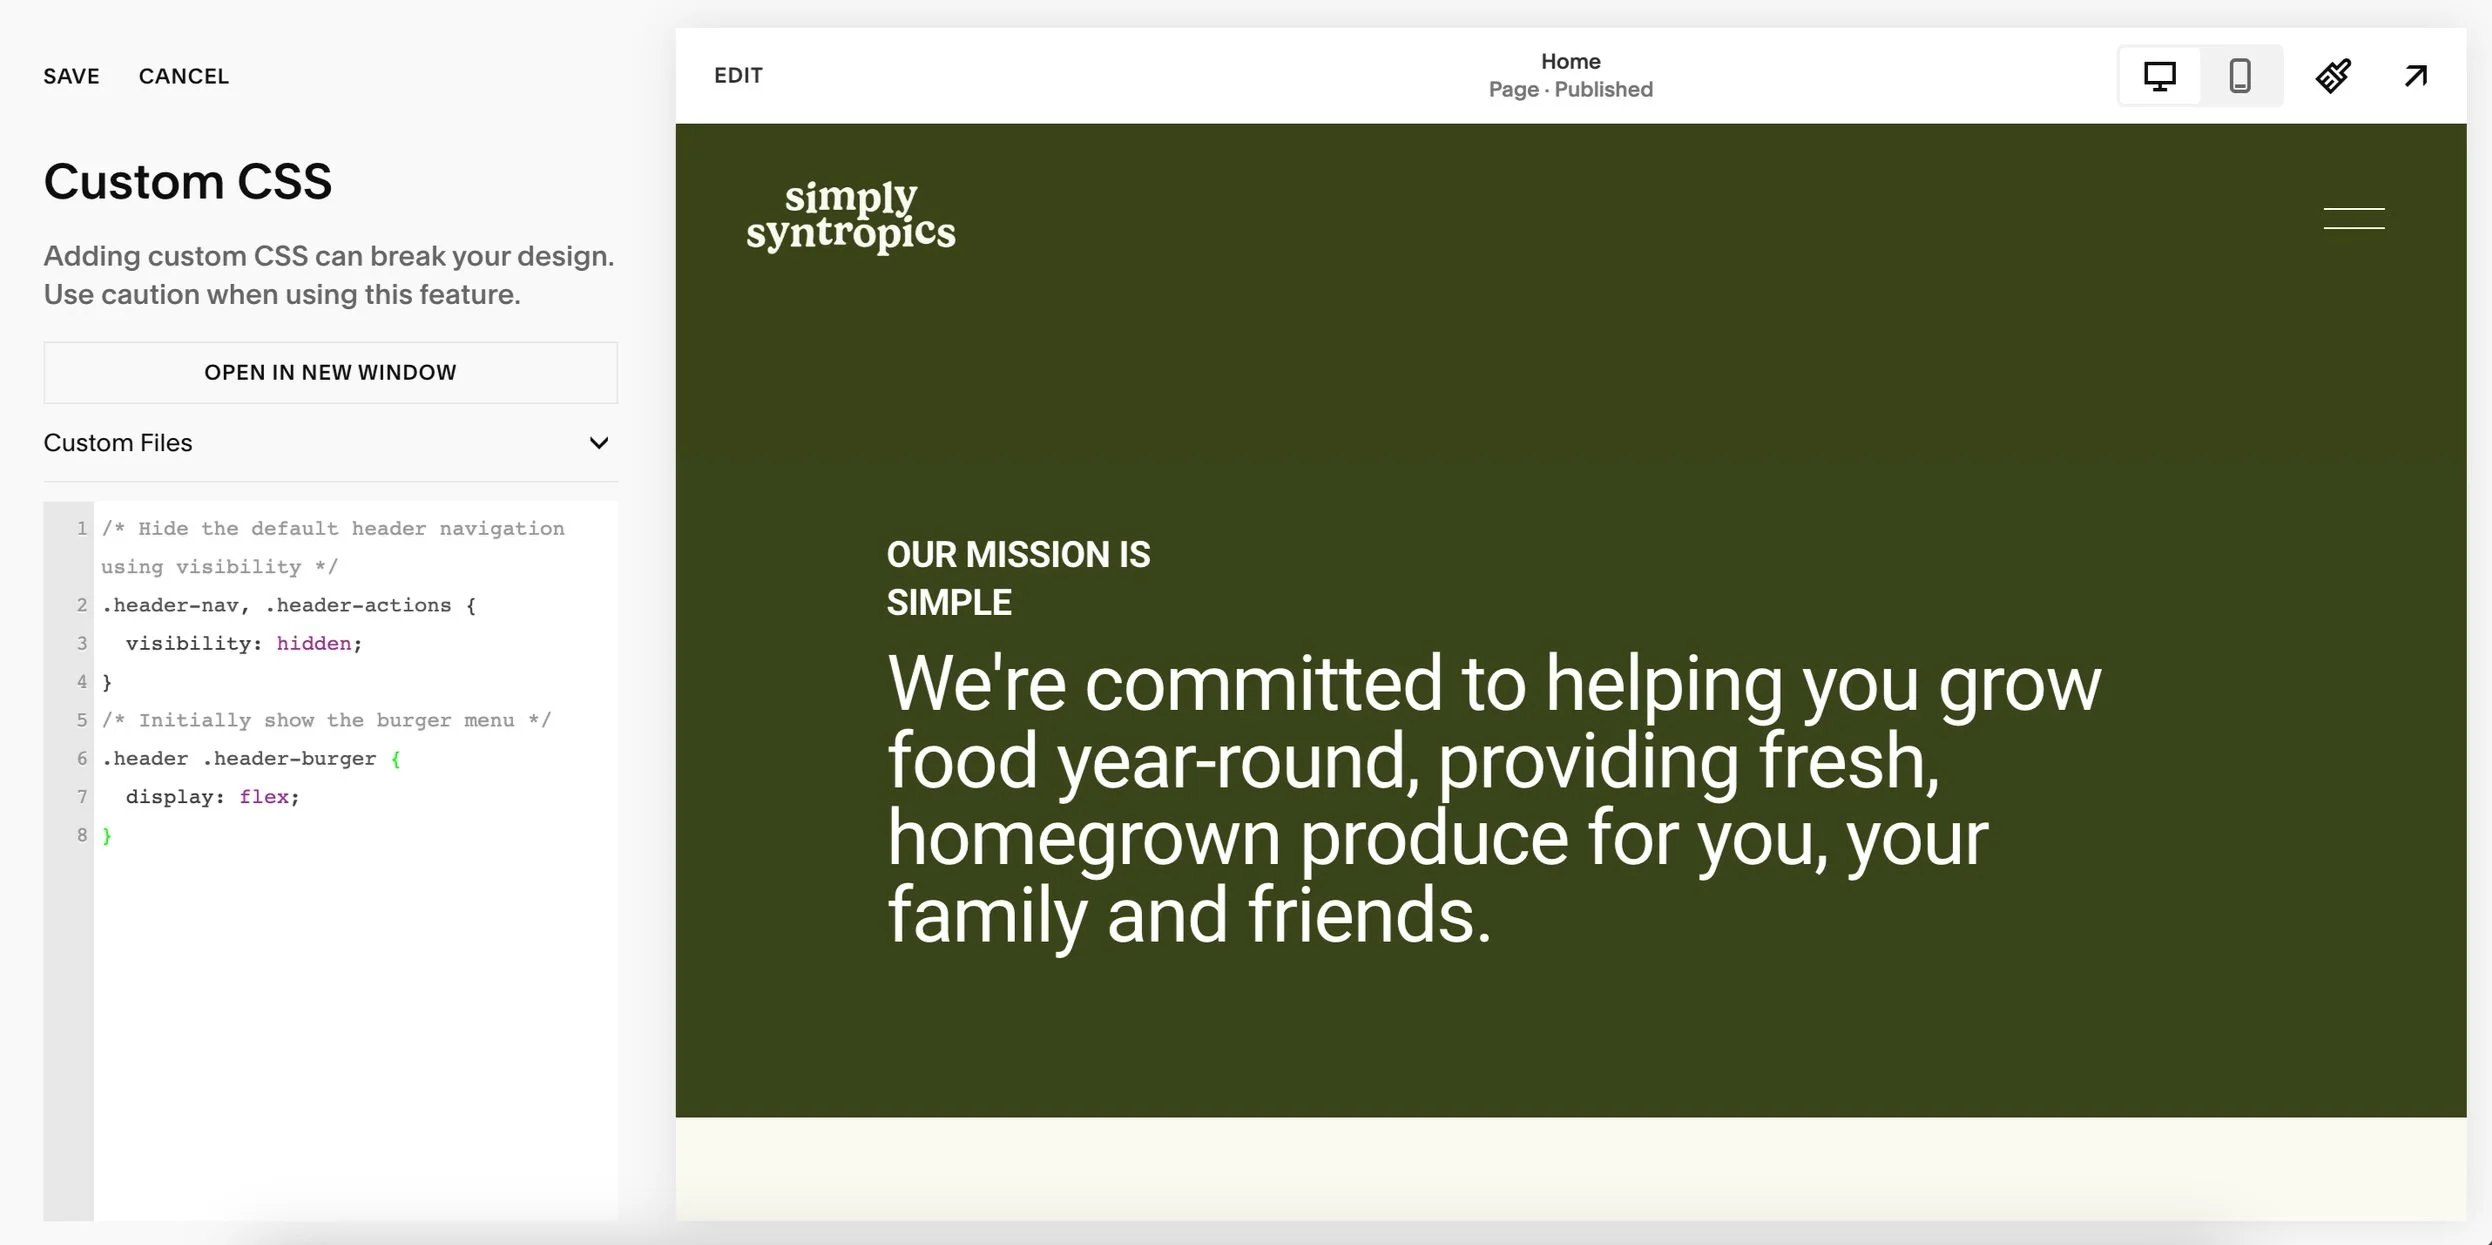
Step 2: Adding Burger Menu
/* Initially show the burger menu */
.header .header-burger {
  display: flex;
}
Explanation:
This code ensures that the burger menu icon is initially displayed using the CSS property
display.The
.header .header-burgerselector targets the element that contains the burger menu icon, ensuring it's visible to users.
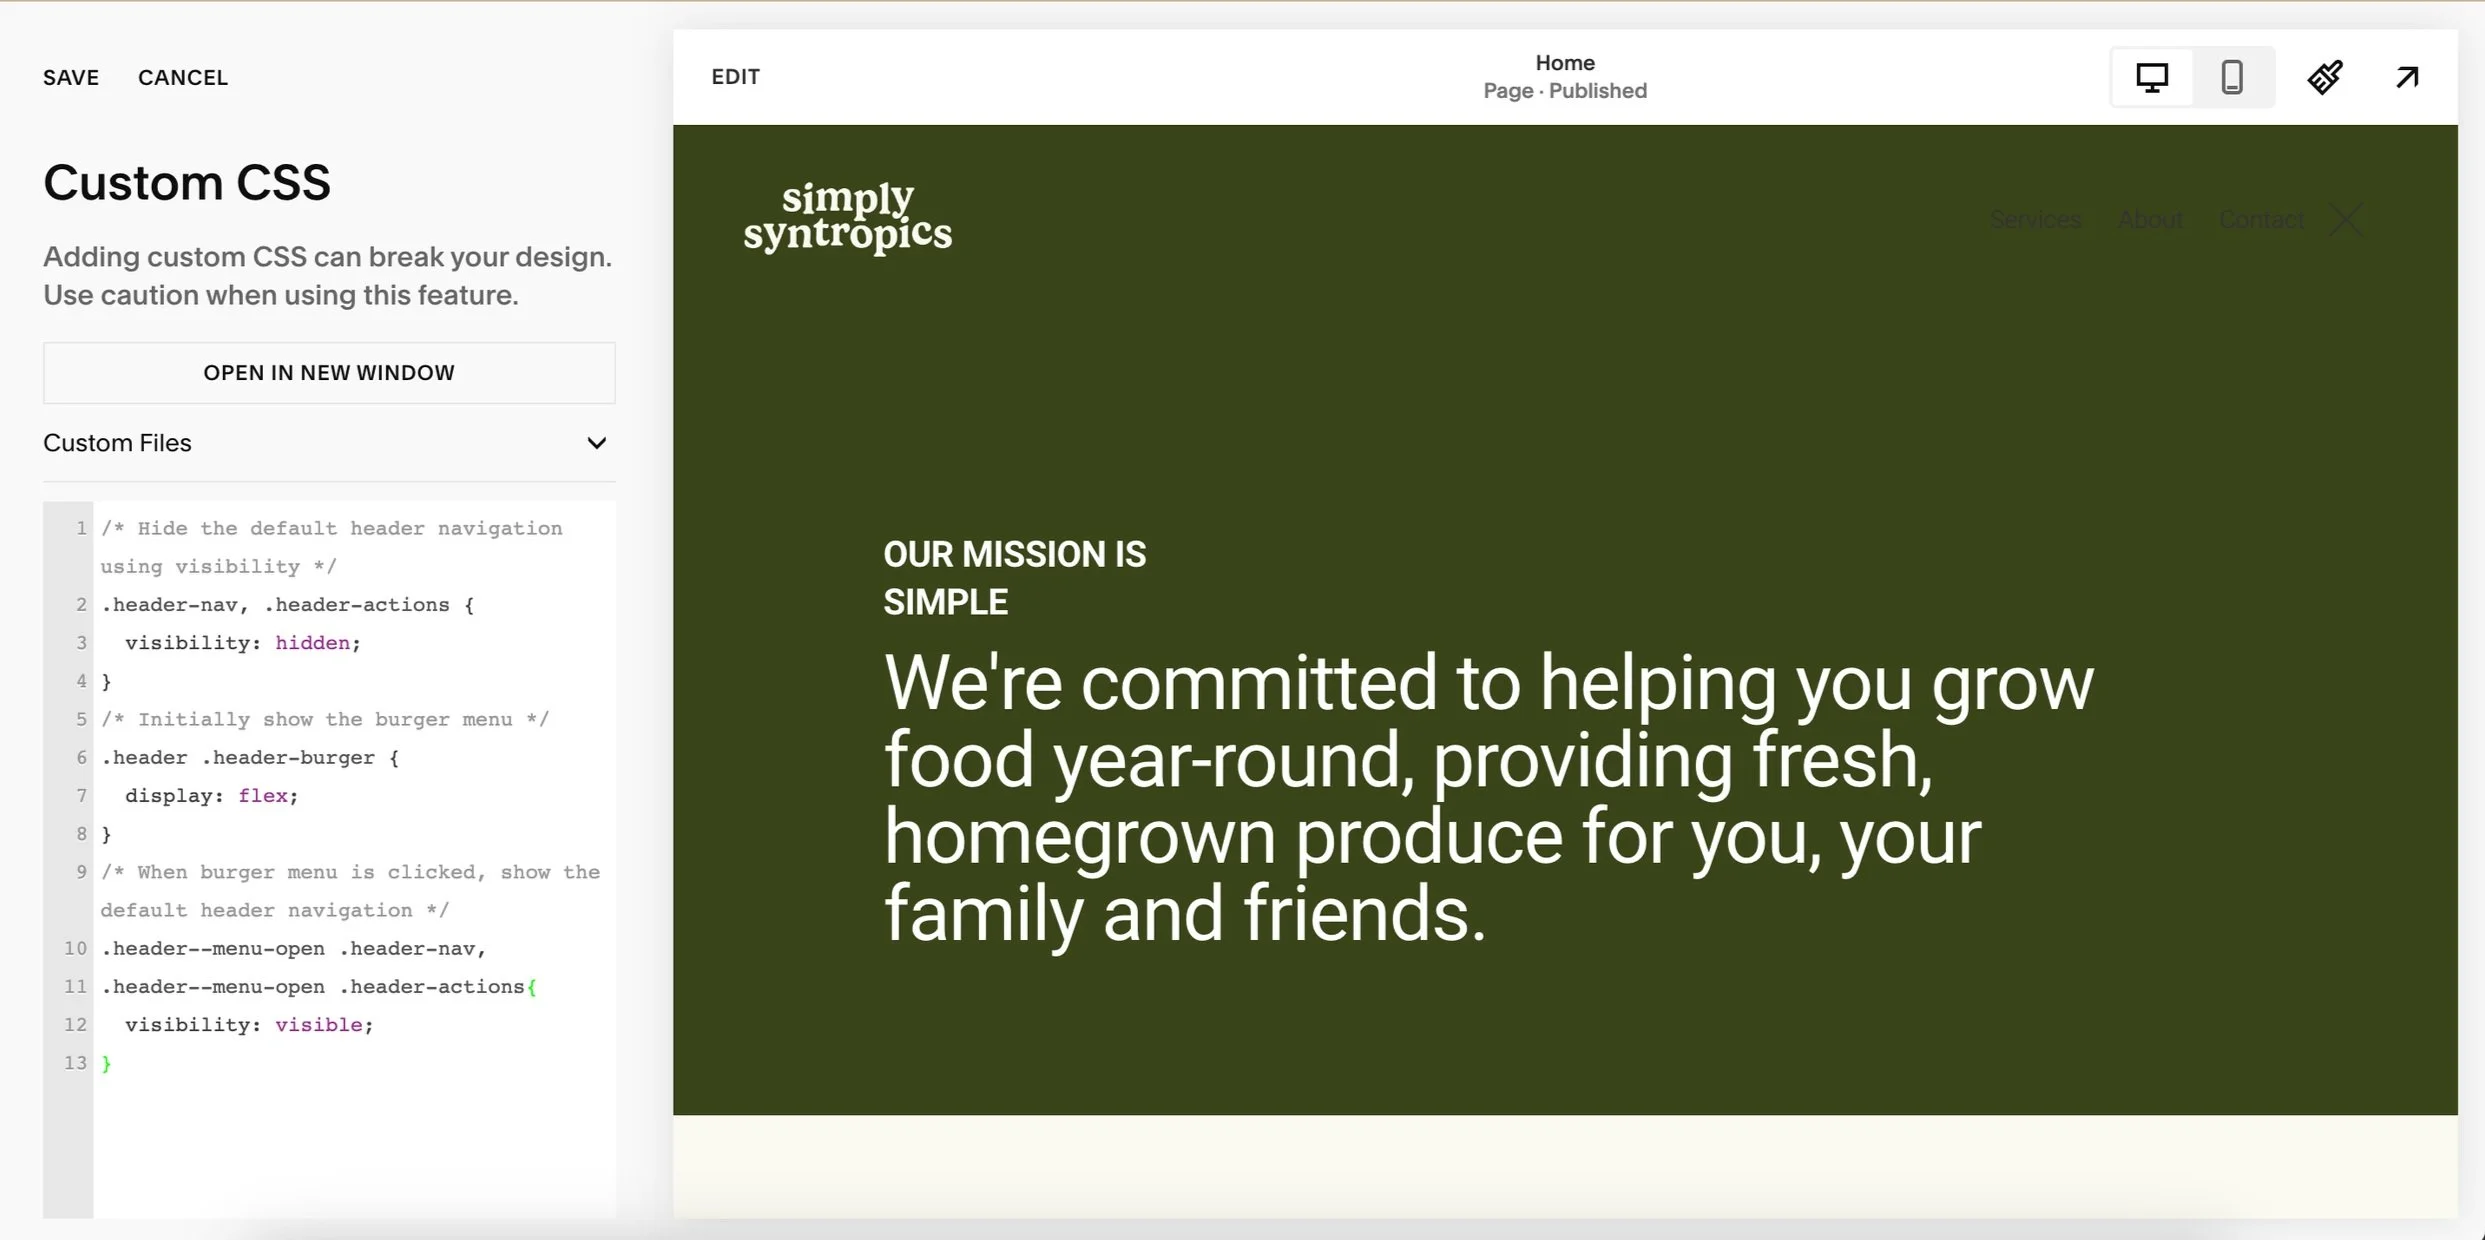
Step 3: Showing Default Header When Burger Menu is Clicked
/* When burger menu is clicked, show the default header navigation */
.header--menu-open .header-nav,
.header--menu-open .header-actions{
  visibility: visible;
}
Explanation:
This code controls the visibility of the default header navigation when the burger menu is clicked.
It applies the CSS property
visibility: visible;to the.header-navand.header-actionselements when the burger menu is open (.header--menu-openclass is active).This ensures that when users interact with the burger menu, the default header navigation becomes visible again, providing access to navigation links and actions.
Currently, the Header Navigation is Grey (hard to see) and so is the X icon. Let’s change that. I show you how you can change the colour of your header navigation and the X icon, in the next step.
In the far right corner you can see the grey header navigations and grey x icon. In the next step I show you how to change the colour. (very hard to see currently)
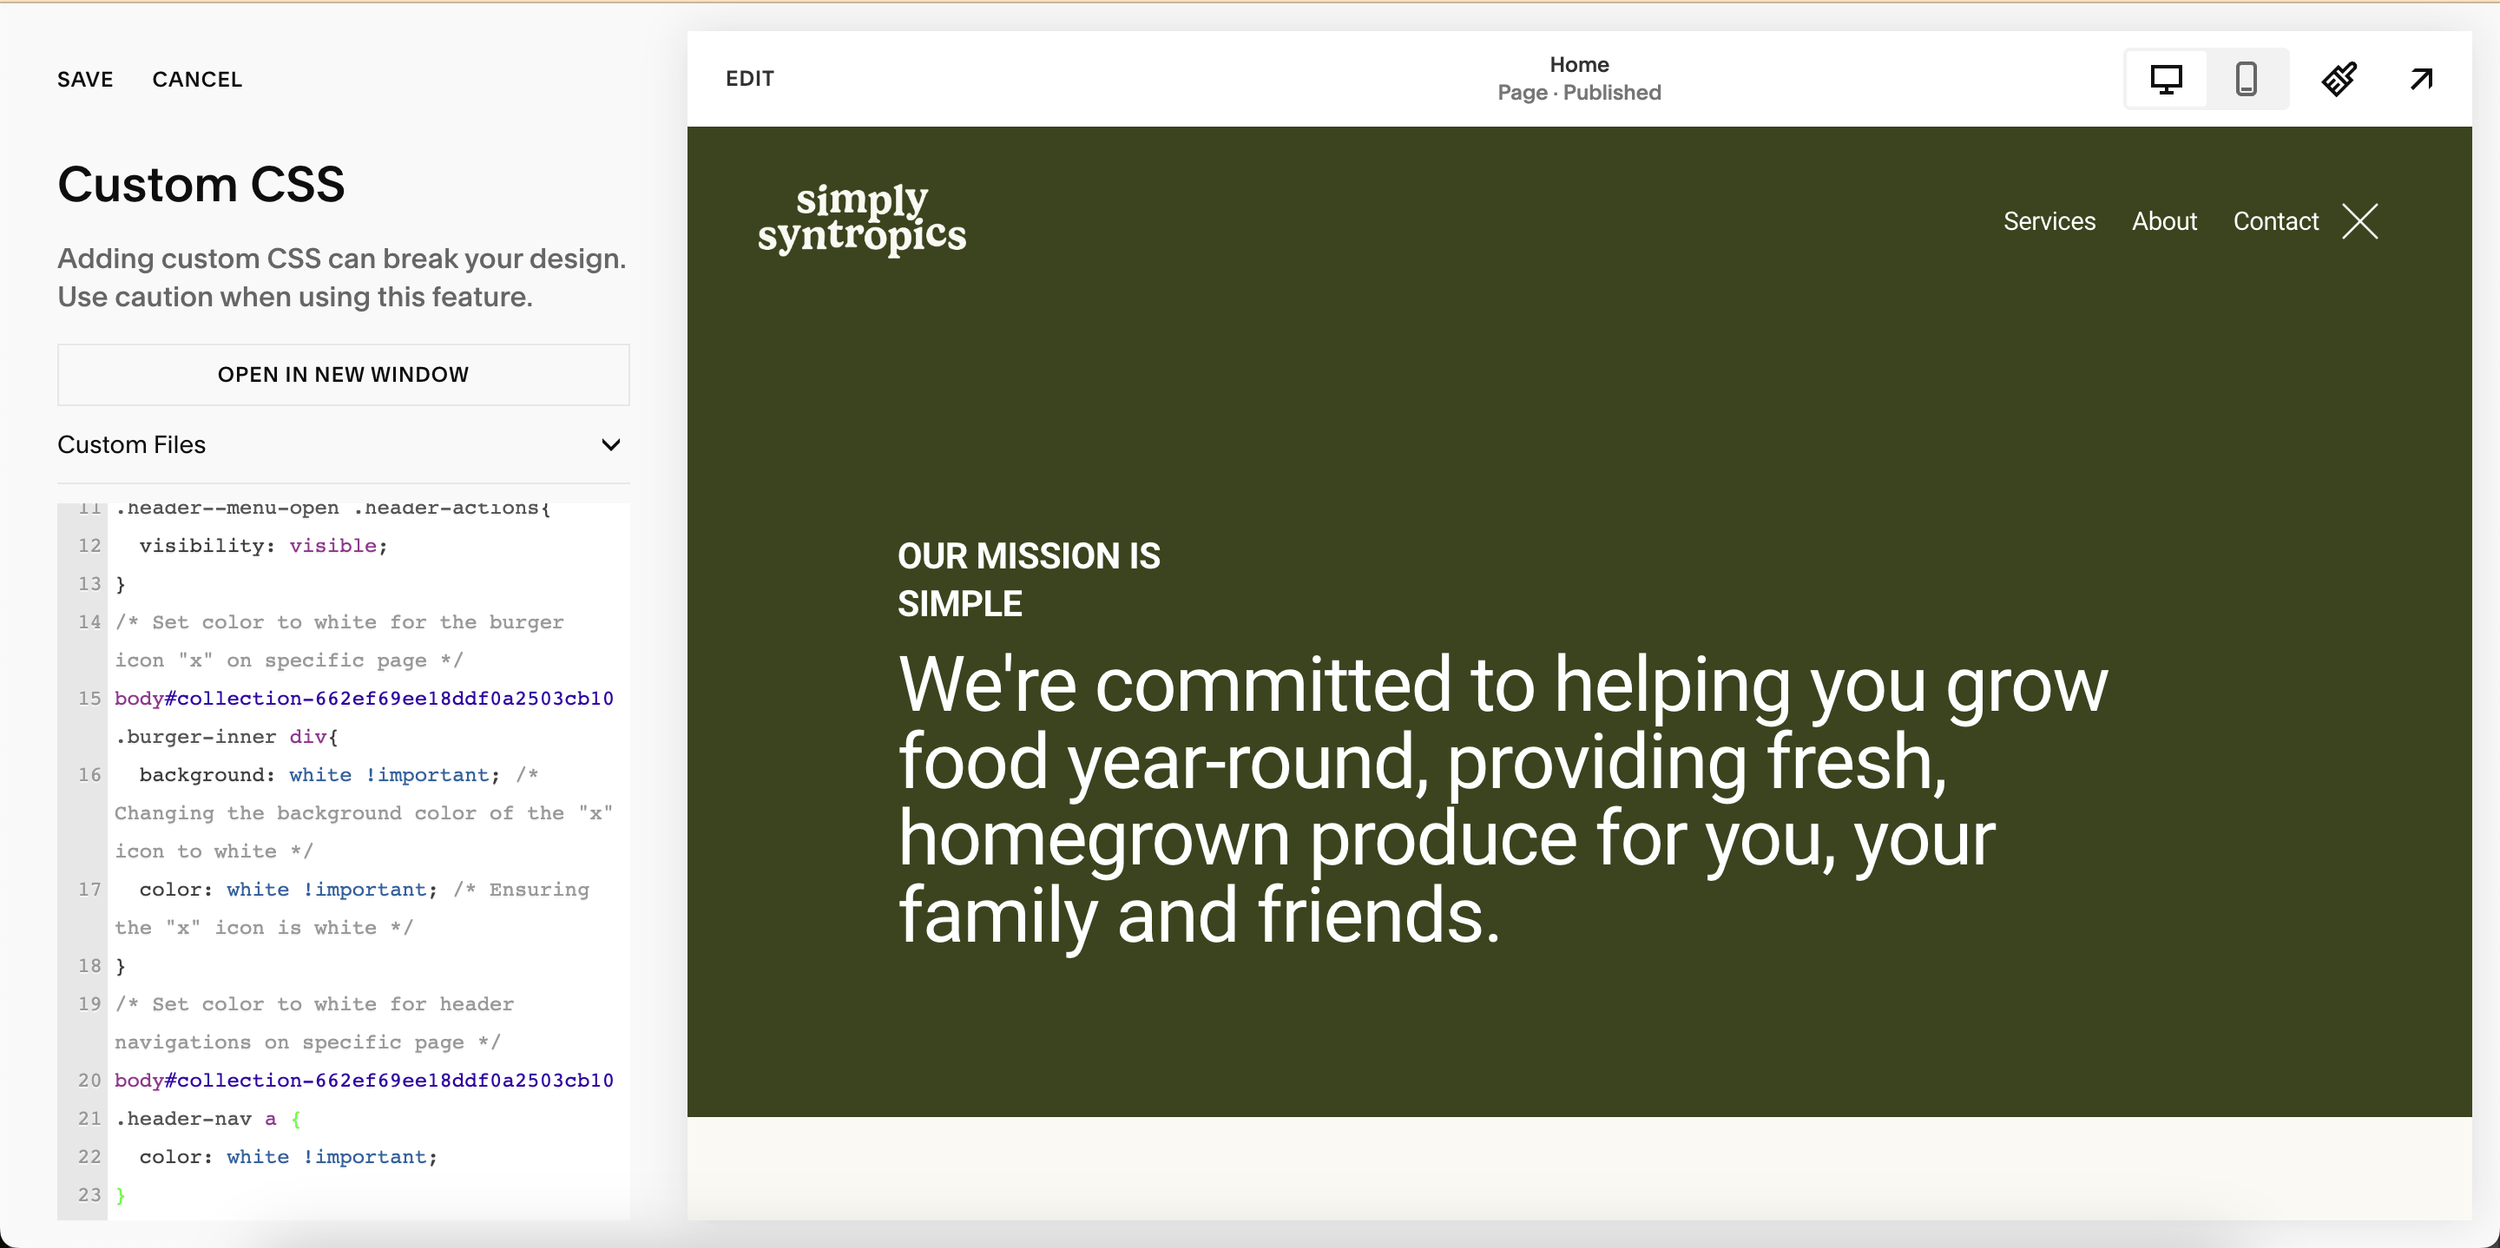
Step 4: Changing the Color of the "X" Icon in the Burger Menu
/* Set color to white for the burger icon "x" on specific page */
body#collection-662ef69ee18ddf0a2503cb10 .burger-inner div{
  background: white !important; /* Changing the background color of the "x" icon to white */
  color: white !important; /* Ensuring the "x" icon is white */
}
Explanation:
This code targets the "X" icon in the burger menu specifically on a particular page (
body#collection-662ef69ee18ddf0a2503cb10).Remember to adjust thebodyID for the color changes according to your specific page. - check out how to get the body id for your Squarespace Website.The CSS properties
backgroundandcolorare used to set both the background colour and text colour of the "X" icon to white.Adding
!importantensures that these styles override any other conflicting styles.
Go here to learn how to use Squarespace Id Finder
Step 5: Changing the Color of Header Navigations with CSS in Squarespace
/* Set color to white for header navigations on specific page */
body#collection-662ef69ee18ddf0a2503cb10
.header-nav a {
  color: white !important;
}
Explanation:
This code targets the links within the header navigation specifically on a particular page (
body#collection-662ef69ee18ddf0a2503cb10). Remember to adjust thebodyID for the color changes according to your specific page.The CSS property
coloris used to set the text color of the header navigation links to white.!importantis added to ensure that these styles take precedence over any other conflicting styles.
Go here to learn how to use Squarespace Id Finder
And there you have it! With these additional CSS tweaks, you can further personalize the appearance of your Squarespace website's header menu and burger icon. Below is the complete CSS code for your reference. Just remember to adjust the body ID for the color changes according to your specific page:
/* Hide the default header navigation using visibility */
.header-nav, .header-actions {
  visibility: hidden;
}
/* Initially show the burger menu */
.header .header-burger {
  display: flex;
}
/* When burger menu is clicked, show the default header navigation */
.header--menu-open .header-nav,
.header--menu-open .header-actions{
  visibility: visible;
}
/* Set color to white for the burger icon "x" on specific page */
body#collection-662ef69ee18ddf0a2503cb10 .burger-inner div{
  background: white !important; /* Changing the background color of the "x" icon to white */
  color: white !important; /* Ensuring the "x" icon is white */
}
/* Set color to white for header navigations on specific page */
body#collection-662ef69ee18ddf0a2503cb10
.header-nav a {
  color: white !important;
}


